Crab shells are nature’s tiny canvases, each with a unique shape, color, and texture. They are charming tokens of the sea that can be transformed into stunning works of art. Whether you’re a seasoned artist or a DIY enthusiast, this blog post will guide you step-by-step on how to clean crab shells for crafts, ensuring that they are ready for your creative endeavors.
Gathering the Supplies

First and foremost, gathering your supplies is crucial. This step is not merely about collecting crab shells; it involves having the right cleaning materials at hand. You will need the following:
- Fresh crab shells
- A sharp knife
- A pair of sturdy gloves
- A large pot
- Dish soap or mild detergent
- A toothbrush
- Bleach
- A cloth or towel
- Sandpaper (of varying grit sizes)
- A sealant, like clear lacquer or varnish
- Storage containers
While the crab shells are the star of this process, the remaining items will aid you in cleaning, disinfecting, and preserving them. Each has a specific role to play, which we’ll discuss in detail in the following sections.
Safety Precautions
Cleaning crab shells involves handling sharp tools and potent chemicals, which warrants the implementation of certain safety precautions. Always wear sturdy gloves while handling the shells and knife. This will protect your hands from possible cuts and also from any potential allergens present in the shells.
When using bleach, make sure you are in a well-ventilated area to prevent inhaling harmful fumes. Do not mix bleach with other cleaning agents as it may create toxic gases. Always rinse your shells thoroughly after applying any cleaning solution. Lastly, ensure your working area is clean and clear of any clutter to prevent accidents.
Removing the Meat
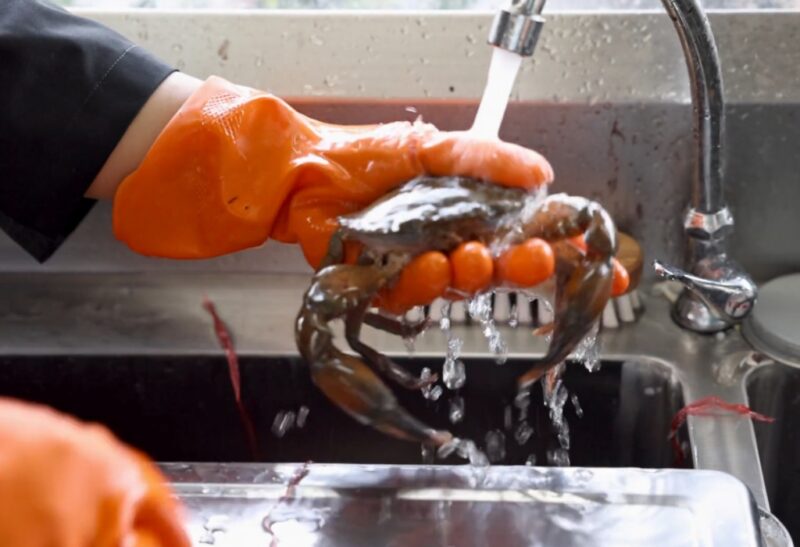
Now, let’s get to the heart of the process. Start by removing the meat from the crab shells. This step is crucial as any remaining meat will rot and produce a foul smell. Using your sharp knife, carefully scrape out any meat or tissue clinging to the inside of the shell. Remember to do this gently to avoid damaging the shell.
Soaking and Boiling
Next, it’s time to thoroughly clean your shells. Fill a large pot with water, add a generous squirt of dish soap or mild detergent, and immerse your shells in this solution. Let them soak for about an hour. This will help in loosening any stubborn bits of meat or tissue.
After soaking, keep the shells in the pot, add more water if needed, and bring it to a boil. Boil the shells for about 15 to 20 minutes. This step aids in further cleaning and also in killing any bacteria present. After boiling, drain the water and let the shells cool.
Scrubbing and Brushing
Once the shells have cooled, scrub them thoroughly with a toothbrush. This will help remove any remaining meat or grime. Pay special attention to any crevices or hard-to-reach areas where dirt might be hidden. After a thorough scrubbing, rinse your shells under warm running water.
Drying and Disinfecting
Once you’re satisfied with the cleaning, lay out your shells on a towel or cloth to dry. Ensure they are completely dry to prevent mold growth.
For an extra layer of disinfection, you can bleach your shells. Mix a solution of one part bleach to nine parts water, and soak the shells in this for about 10 minutes. Rinse thoroughly afterward to remove any bleach residue. Remember to handle bleach safely and responsibly.
Smoothing and Polishing
Smoothing and polishing your shells will make them look shiny and beautiful, ready for your crafts. Start by using sandpaper to gently smooth out any rough edges or bumpy areas on your shells. Begin with a coarse-grit sandpaper, then move to a finer grit for a polished finish.
Once smoothed, apply a clear lacquer or varnish to your shells. This not only adds a gleaming finish but also acts as a sealant, protecting your shells from damage and deterioration.
Storage and Preservation
Store your shells in a cool, dry place. To avoid damage, it’s best to keep them in individual compartments or wrapped in cloth or paper. Regularly check your shells for any signs of mold or damage. If needed, clean and disinfect them again to keep them in prime condition.
Craft Ideas Using Crab Shells
Now that you have your pristine crab shells let’s talk about crafts. There are countless possibilities! You can paint intricate designs on them or use them as natural embellishments for home décor items, jewelry, or even Christmas ornaments. Larger shells can be turned into soap dishes, candle holders, or serving bowls. The only limit is your imagination!
Cleaning Crab Shells: Beyond the Basics
While we’ve already gone over the key steps in cleaning crab shells for crafting, let’s delve deeper into this intriguing process. We’ll explore alternative cleaning methods, discuss the specifics of working with different types of crab shells, and even provide additional craft ideas.
Alternative Cleaning Methods
While soaking and boiling are common practices, there are alternative methods that may better suit certain types of shells or personal preferences.
One such method involves using a solution of vinegar and water for soaking. The acidic nature of vinegar can effectively loosen any remaining bits of meat and may provide an additional layer of disinfection.
Another alternative is to use an enzyme-based cleaner commonly available in pet stores. These cleaners are designed to break down organic matter and can be a handy tool when dealing with stubborn bits of crab meat.
Understanding Different Crab Shells
Different types of crabs yield different types of shells, each with its own unique properties. For instance, Blue Crab shells are known for their vibrant colors, while Dungeness Crab shells are larger and can accommodate more intricate designs.
Understanding the specific characteristics of the shells you’re working with can help you tailor your cleaning process accordingly. Some shells may require more vigorous scrubbing, while others might be more delicate and need a gentler touch.
Additional Craft Ideas
With your cleaned and prepared crab shells, the world of crafts is your oyster. Here are a few more ideas to spark your creativity:
- Shadow Boxes: Use shells of various sizes to create a 3D seaside scene within a shadow box. Add miniature figurines, sand, and small pebbles for an immersive effect.
- Photo Frames: Decorate the border of a simple photo frame with crab shells for a beach-themed look.
- Wind Chimes: Attach crab shells to a piece of driftwood using strong twine. When the wind blows, the shells will create a soft, tinkling sound reminiscent of the sea.
- Garden Decoration: Larger crab shells can be placed among plants in your garden, creating a whimsical and natural decoration.
- Jewelry: Smaller shells can be turned into pendants, earrings, or even brooches. Paint or embellish them, then add a chain or pin.
Revisiting Safety Precautions
While we’ve already discussed safety precautions, it’s worth emphasizing their importance, particularly when exploring alternative cleaning methods. Remember to always handle cleaning agents, sharp objects, and shells with care. Keep your work area clean, and if you’re crafting with kids, ensure adult supervision at all times.
Final Words
Cleaning crab shells for crafts might seem like a daunting task, but with the right approach, it becomes a rewarding and engaging process. It’s a journey that leads you from the rugged, raw beauty of nature to the polished perfection of art, all while offering a unique and sustainable way to appreciate the sea’s gifts. So go ahead, gather your shells, and embark on this creative adventure today!